

Benachrichtigungen
Crowdin bietet verschiedene Arten von Benachrichtigungen an, um den unterschiedlichen Anforderungen der Benutzer gerecht zu werden, darunter:
- Project Updates: Notify users of changes to the project, such as new content to translate or updates to existing content.
- Translation Activity: Notify users of new translations, approvals, or comments on translations.
- Task Management: These notifications inform users about new tasks, deadlines and task completions.
- Team Communication: These alerts notify users of messages and discussions within the project.
Um die Benachrichtigungen anzuzeigen, klicke oben rechts auf der Seite auf das Glockensymbol .
Mit Updates, die direkt an Slack gesendet werden, weißt du sofort, was in den Crowdin-Projekten passiert, die du verwaltest oder zu denen du beiträgst. Nachdem du dein Crowdin-Konto mit Slack integriert hast, wähle die Benachrichtigungen aus, die du erhalten möchtest, und der Crowdin-Bot sendet sie als Direktnachrichten.
Um Crowdin-Benachrichtigungen über Slack zu erhalten, gehe wie folgt vor:
- Klicke oben rechts auf dein Profilbild und wähle Einstellungen.
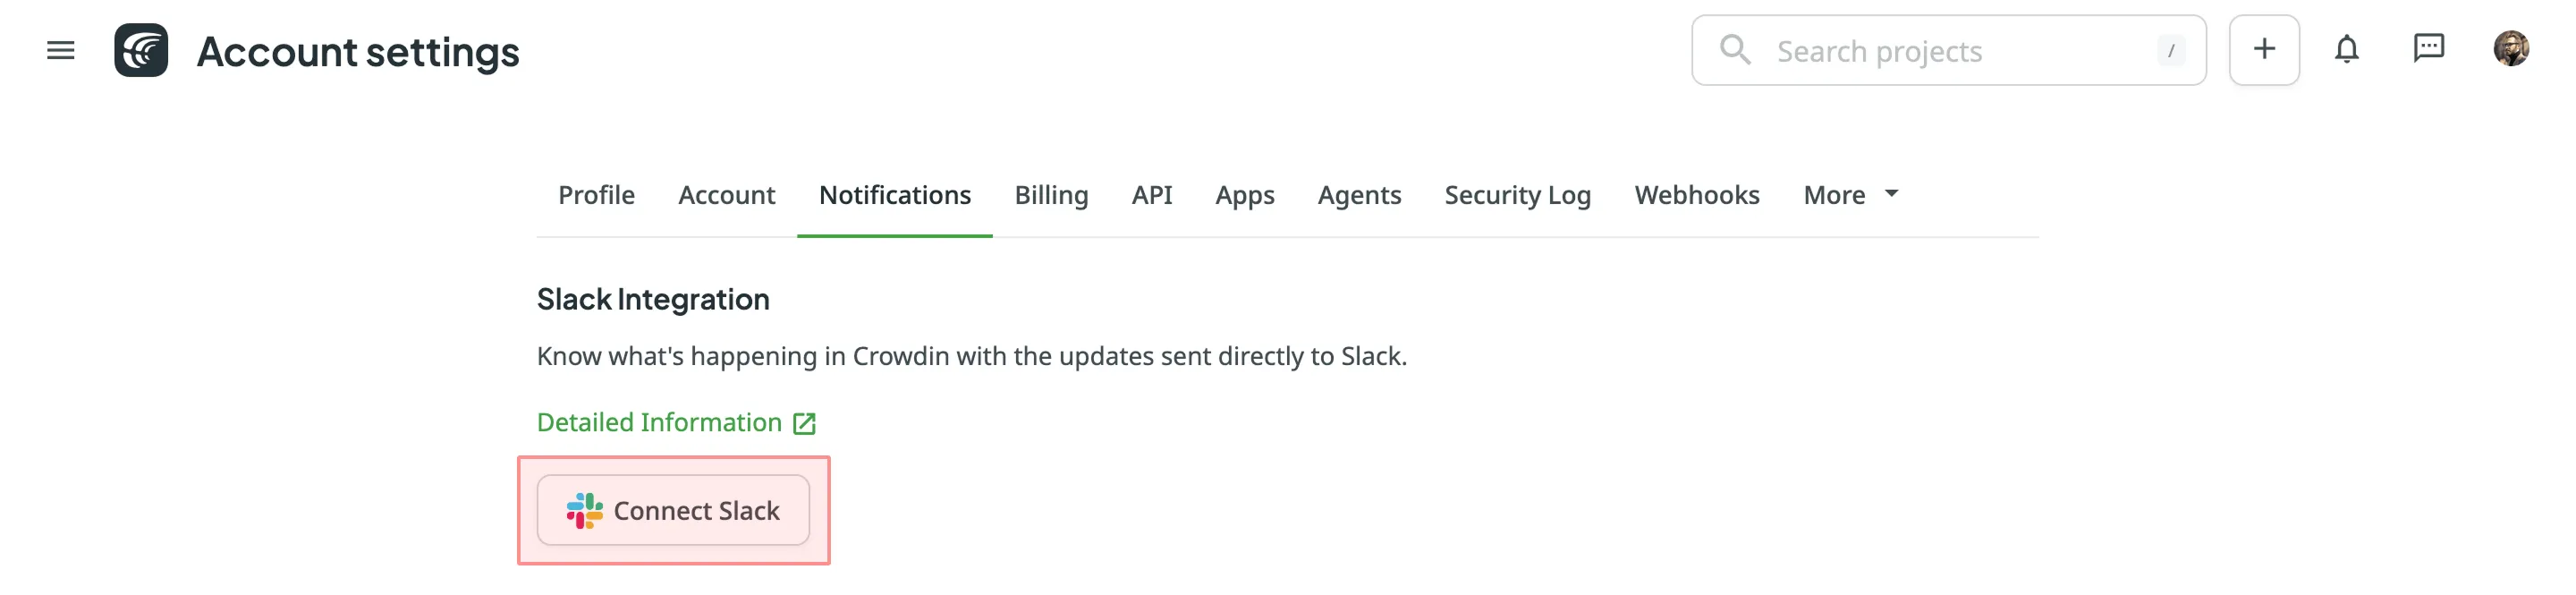
- Wechsle zum Tab Benachrichtigungen und klicke auf Slack verbinden.
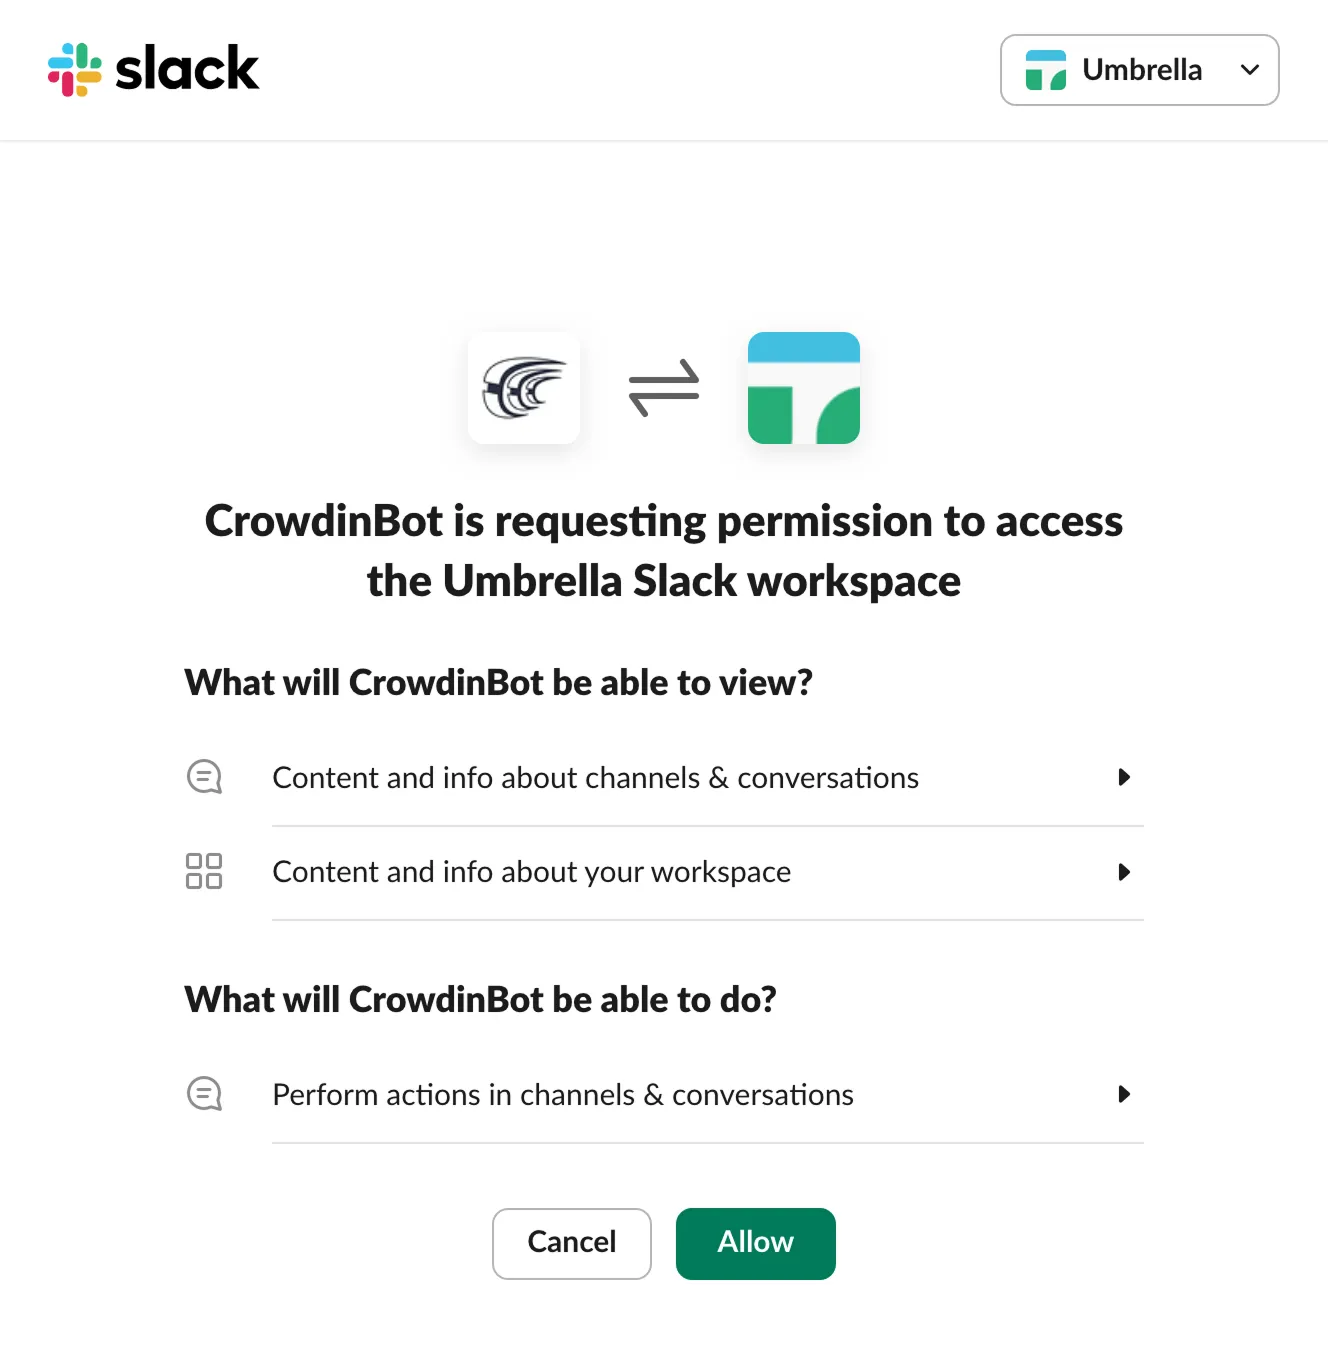
- Bestätigen Sie die Verbindung mit Crowdin auf der Slack-Seite.
- Go back to Crowdin and select the notifications you want to receive in Slack.
Mehr über globale Benachrichtigungseinstellungen erfahren.
You will receive the selected types of notifications as direct messages from the Crowdin bot.
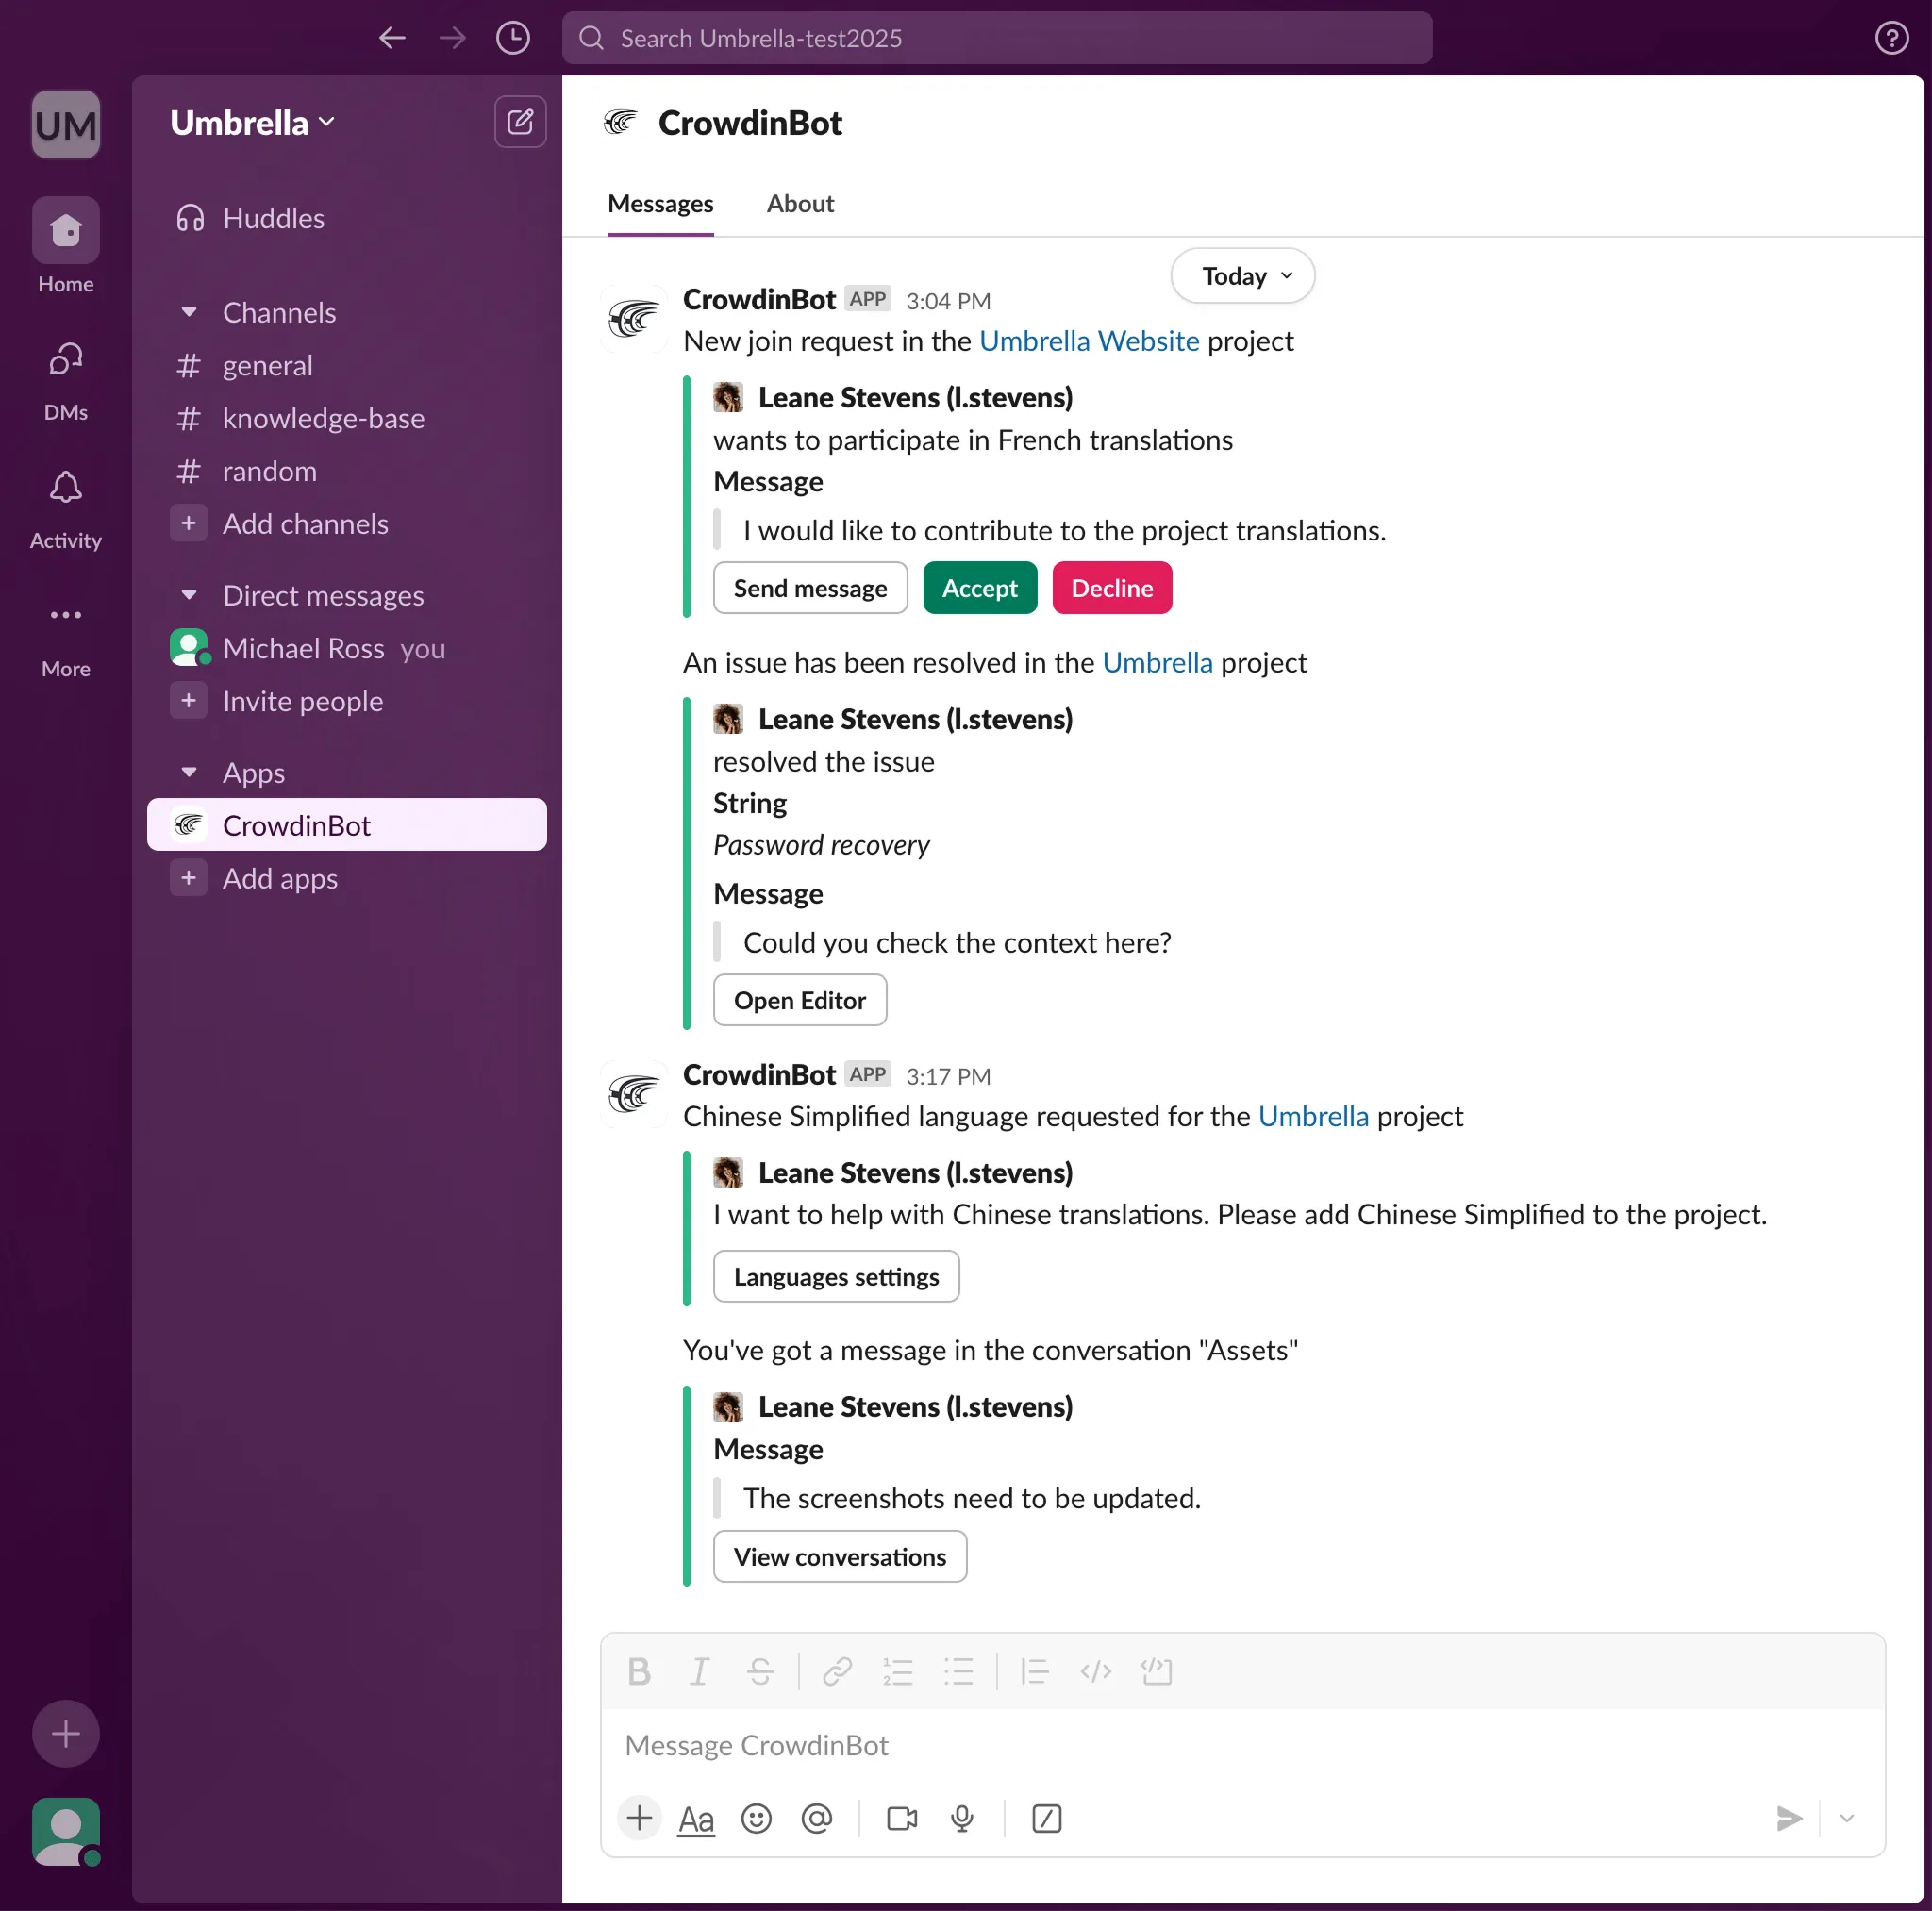
Sie können außerdem jederzeit die Benachrichtigungen deaktivieren und von Crowdin trennen.
Benutzerdefinierte Benachrichtigungen ermöglichen es dir, Informationen über neue Ereignisse in Crowdin zu erhalten. Sobald du benutzerdefinierte Benachrichtigungen für dein Konto konfiguriert hast, sendet Crowdin POST-Anfragen mit Daten über HTTP an die URL für benutzerdefinierte Benachrichtigungen.
You can configure custom notifications to build integrations with the services or with your backend. For example:
- Set up custom notifications to send notifications to the system you use.
- Übermittle Informationen an Drittanbieterdienste entsprechend den spezifischen Anforderungen der Anfrage (z. B. Inhaltstyp, Header, Payload).
- Erstelle benutzerdefinierte Integrationen mit Crowdin.
Um benutzerdefinierte Benachrichtigungen in Crowdin zu konfigurieren, gehe wie folgt vor:
- Öffne deine Kontoeinstellungen und gehe zum Tab Benachrichtigungen.
- Klicke im Bereich Benutzerdefinierter Benachrichtigungskanal auf Benutzerdefinierten Benachrichtigungskanal einrichten, um mit der Konfiguration deiner benutzerdefinierten Benachrichtigungen zu beginnen.
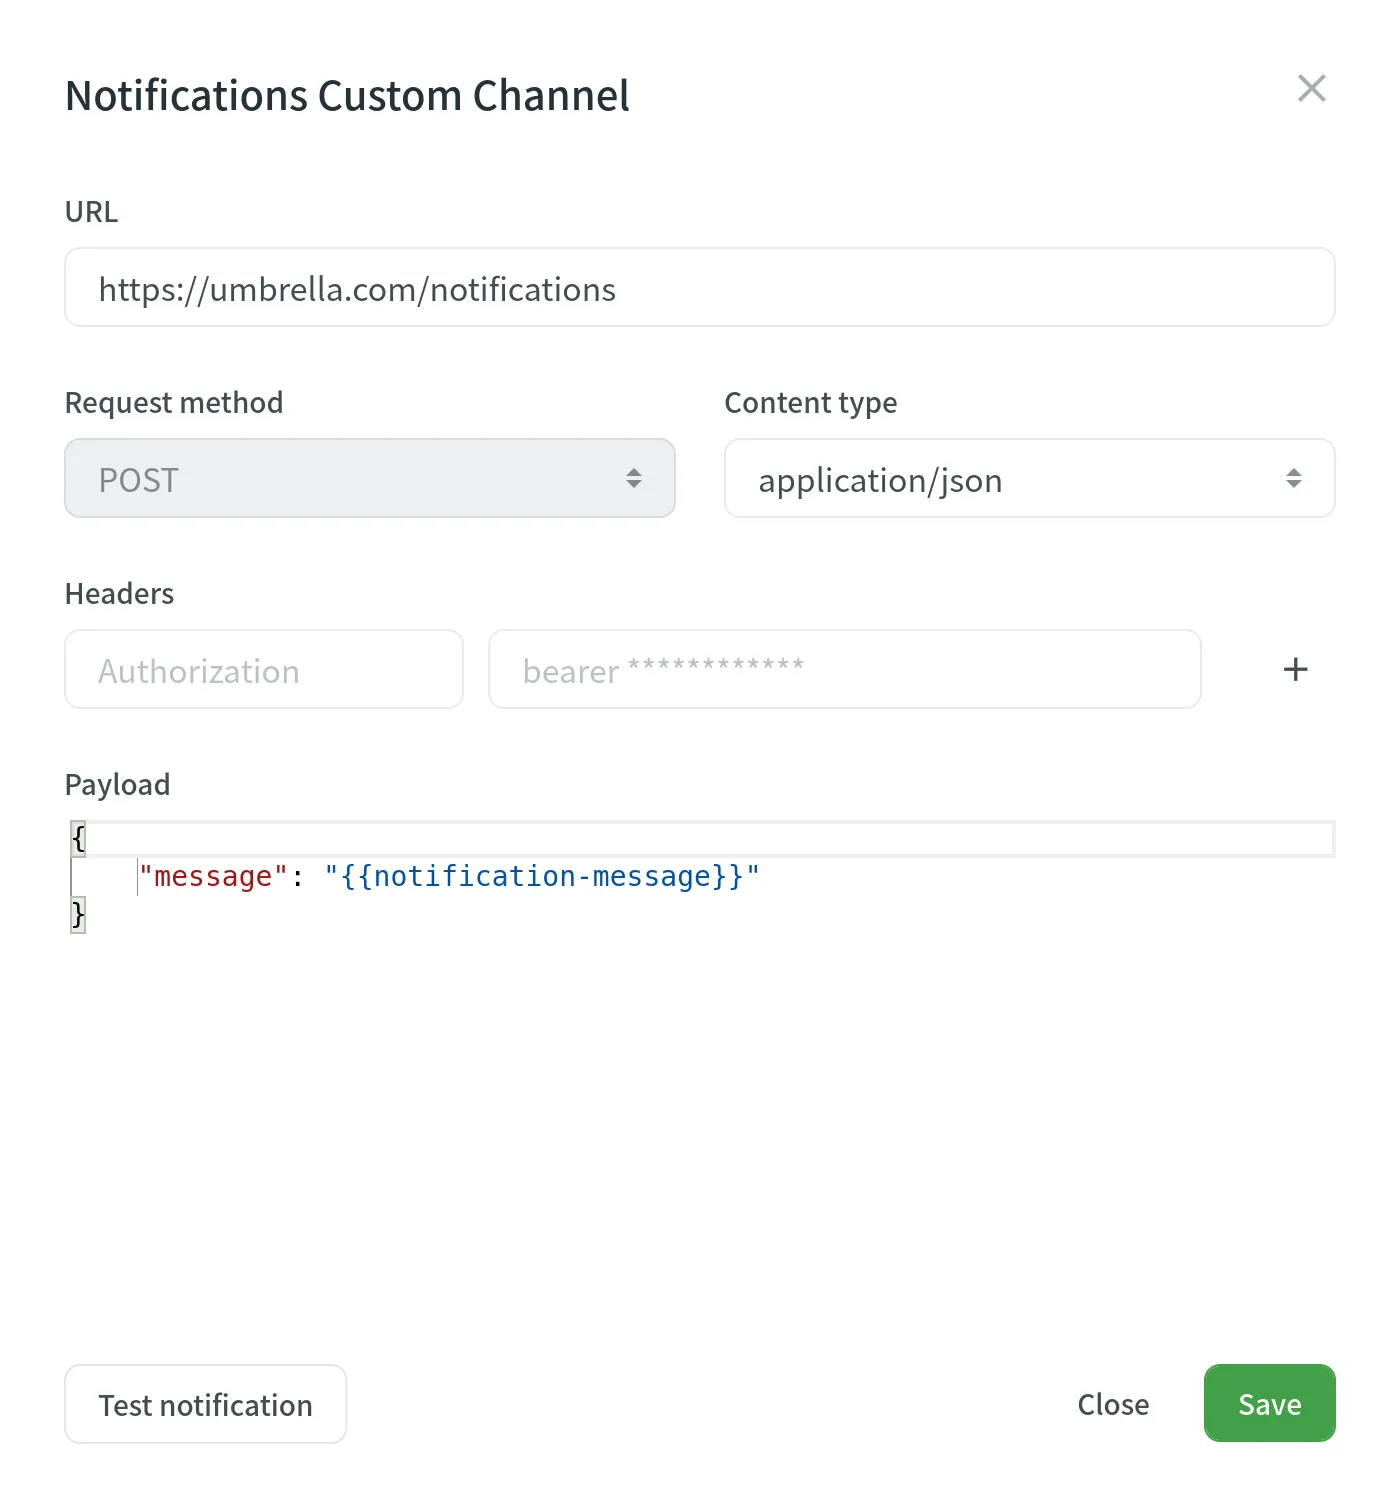
You will need to provide the following information to set up custom notifications:
- The URL where the callback should be sent.
- The content type for the POST request method (
multipart/form-data,application/json, orapplication/x-www-form-urlencoded).
Optionally, you can add special headers to your custom notifications. They can be used for additional security, as an authorization method, and more. Wenn du beispielsweise Header hinzufügst, kann dein Endpunkt für benutzerdefinierte Benachrichtigungen diese überprüfen und sicherstellen, dass die Informationen von Crowdin stammen.
When configuring custom notifications, click Test notification to see how your application will react to that call. Once finished with the configuration, click Save.
Abhängig davon, wie du benutzerdefinierte Benachrichtigungen verwaltest, musst du möglicherweise bestimmte Crowdin-IP-Adressen zu deiner Firewall hinzufügen, damit Crowdin auf die vorkonfigurierten URLs für benutzerdefinierte Benachrichtigungen zugreifen kann.
Read more about IP Addresses.
Du kannst die Payload für benutzerdefinierte Benachrichtigungen ändern, um die Elemente entsprechend den Anforderungen deines Systems hinzuzufügen und zu organisieren. To get informative and user-friendly notifications, make sure to include the {{notification-message}} placeholder in your payload.
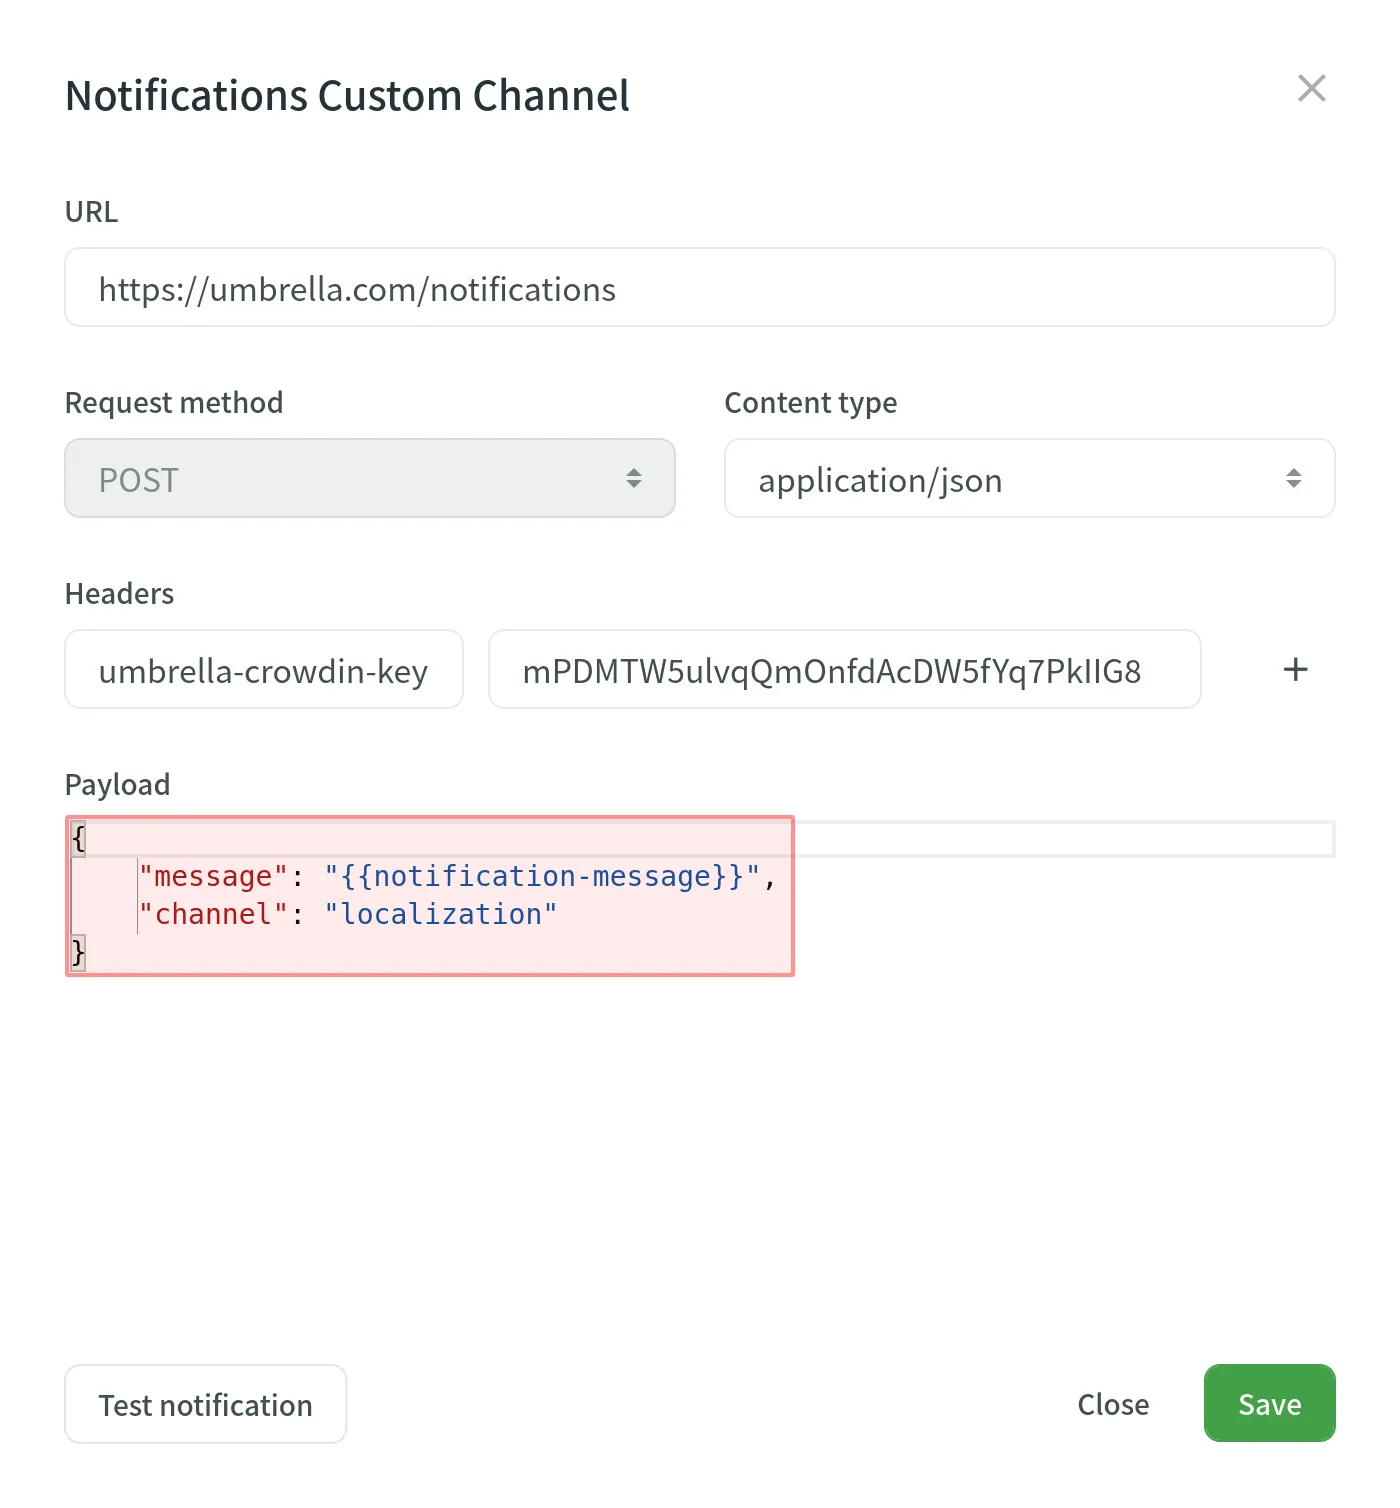
Nachdem du benutzerdefinierte Benachrichtigungen konfiguriert hast, kannst du in der Spalte Benutzerdefiniert die Ereignistypen auswählen, über die du Benachrichtigungen erhalten möchtest.
You can configure custom notifications for the following event types:
| Ereignistyp | Beschreibung |
|---|---|
| Benutzer & Rollen | Beitrittsanfragen, Projekt-Einladungen, Aktualisierungen von Projektrollen. |
| Einbindungen | Aktualisierungen zu Integrationen, die du eingerichtet hast. |
| Neue Zeichenketten | Neue Zeichenketten hinzugefügt. |
| Sprachfortschritt | Übersetzung oder Korrekturlesen für eine bestimmte Sprache ist abgeschlossen. |
| API-integrierte Anbieter | Aktualisierungen zur Zusammenarbeit mit API-integrierten Übersetzungsanbietern. |
| Inhalts-Probleme | Alle im Editor erstellten oder gelösten Problemtypen. |
| Erwähnungen | Aktualisierungen, wenn du im Editor erwähnt wirst. |
| Aufgaben | Erstellte, gelöschte und aktualisierte Aufgaben, Statusänderungen, Erwähnungen und Kommentare. |
| Nachrichten | Private Nachrichten innerhalb von Crowdin. |
| Discussions | Neue Themen erstellt. Erwähnungen in den Diskussionen. |
| API-Benachrichtigungen | Benachrichtigungen, die von Apps, API-Integrationen und Benutzern über die API gesendet werden. |
Du kannst benutzerdefinierte Benachrichtigungen im Bereich Benutzerdefinierter Benachrichtigungskanal des Tabs Benachrichtigungen bearbeiten oder löschen.
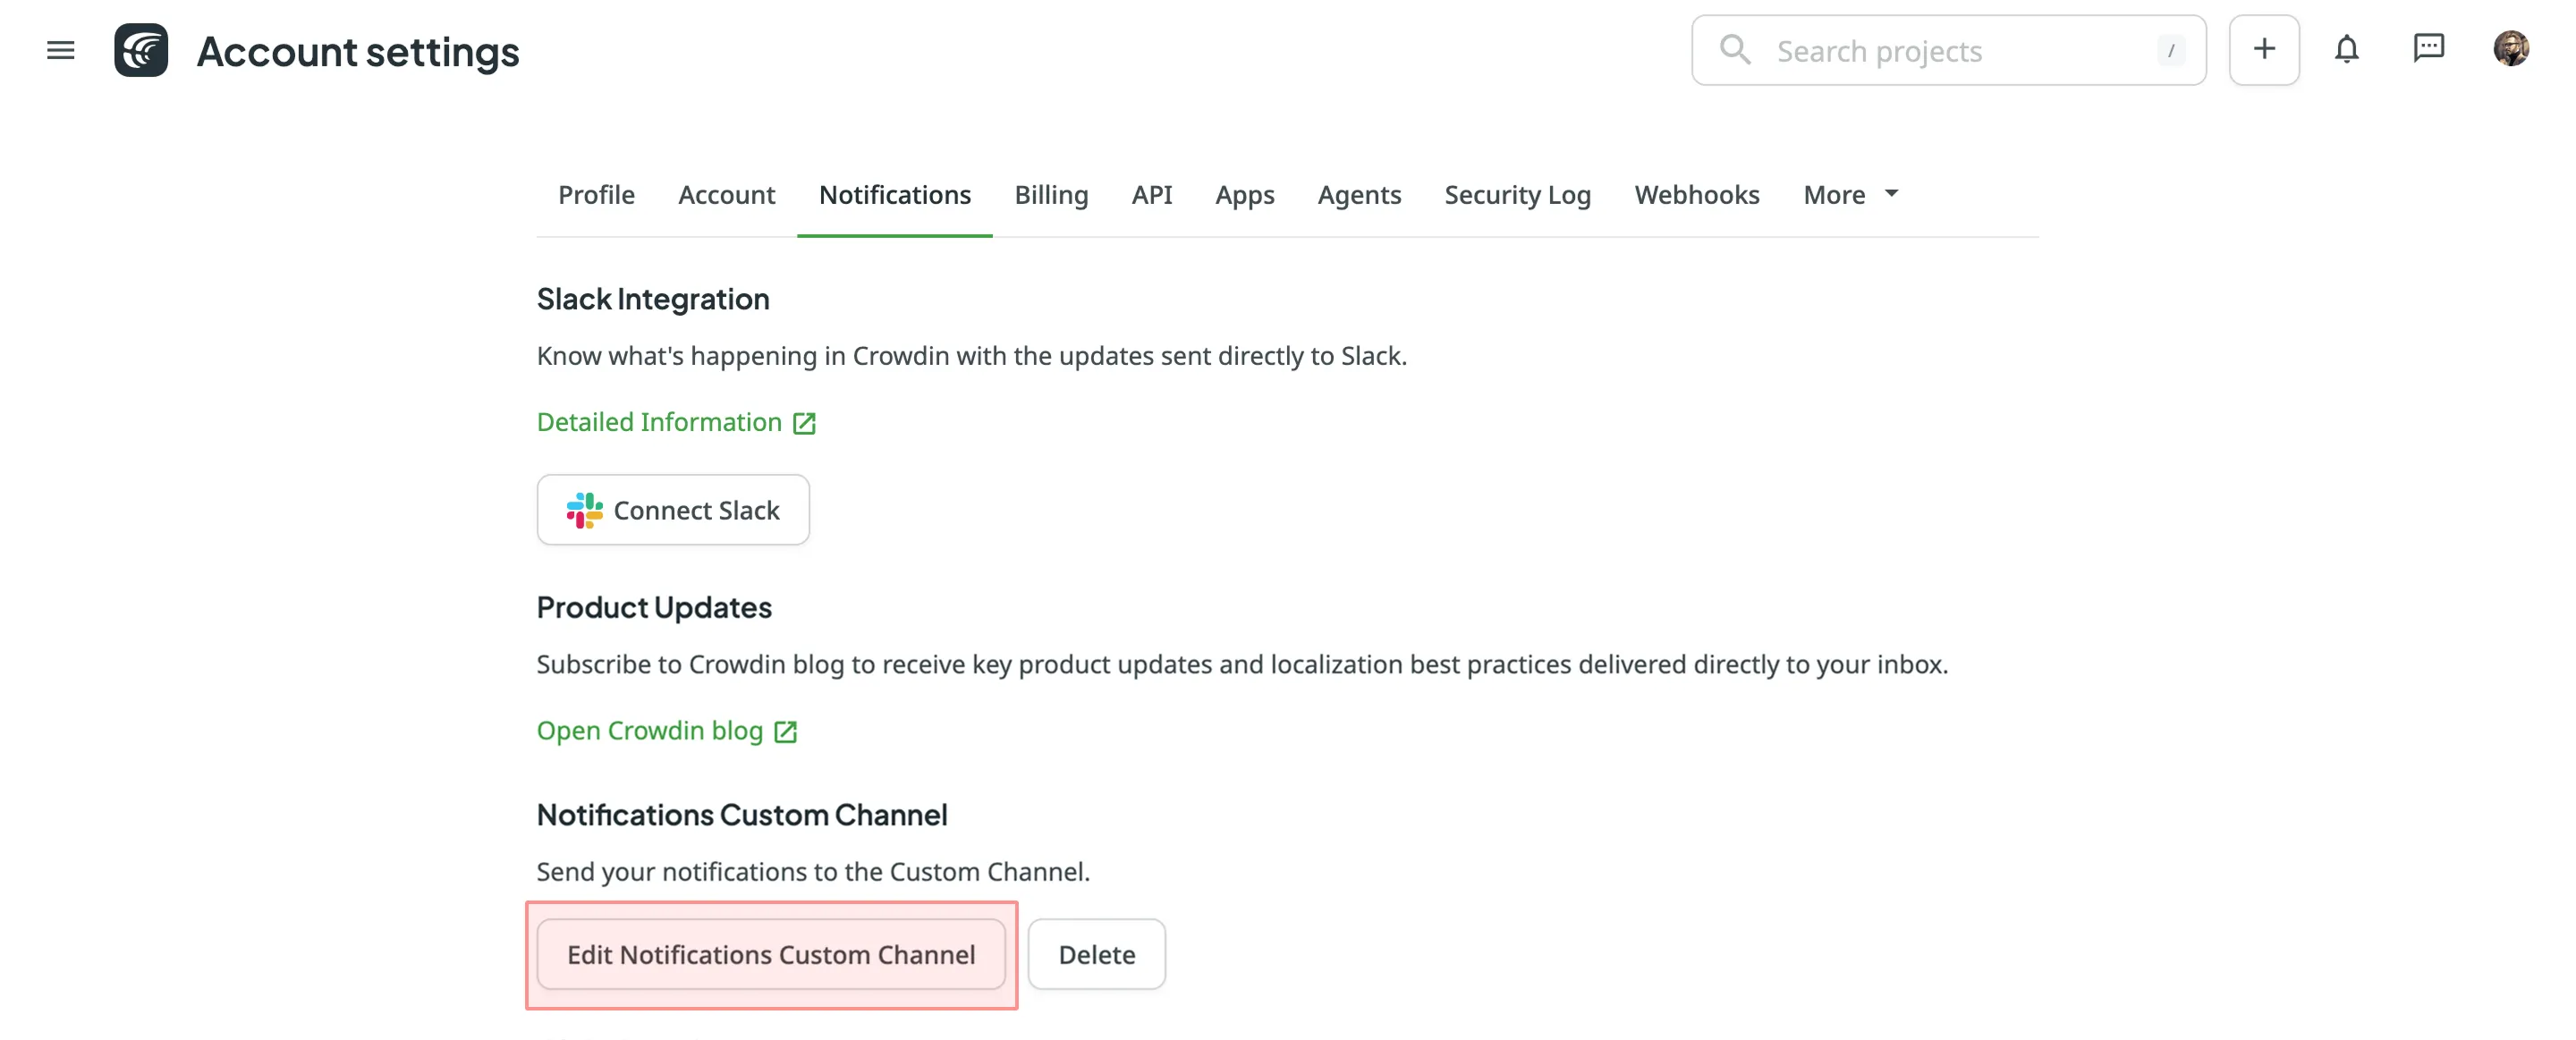
Um benutzerdefinierte Benachrichtigungen von Crowdin in Discord einzurichten, gehe wie folgt vor.
If you don’t have a Discord account already, you will need to create one.
Download and install the Discord desktop app. Alternatively, you may use the Discord web interface for further configurations.
To receive notifications in Discord, you need to create a webhook. Once finished, copy the webhook URL. Du benötigst dies für die Konfiguration auf der Crowdin-Seite.
Read more about creating a Discord webhook.
Configuring Custom Notifications Channel
Abschnitt betitelt „Configuring Custom Notifications Channel“- Öffne Kontoeinstellungen > Benachrichtigungen.
- Klicke auf Benutzerdefinierten Benachrichtigungskanal einrichten.
- In the appeared dialog, paste the Discord webhook URL in the URL field.
- Select application/json for the Content type.
- Paste the following payload in the Payload field:
{"content": "{{notification-message}}"}
- Klicke auf Benachrichtigung testen, um eine Testnachricht von Crowdin an deinen Discord-Kanal zu erhalten.
- Once finished with the configuration, click Save.
Um benutzerdefinierte Benachrichtigungen von Crowdin in Google Chat einzurichten, gehe wie folgt vor.
If you already have a Google account, it gives you access to many Google products, including Google Chat. If you don’t have a Google account, you will need to create one.
Download and install the Google Chat desktop app. Alternatively, you may use the Google Chat web interface for further configurations.
To receive notifications in Google Chat, you need to create a webhook. Once finished, copy the webhook URL. Du benötigst dies für die Konfiguration auf der Crowdin-Seite.
Read more about creating a Google Chat webhook.
Configuring Custom Notifications Channel
Abschnitt betitelt „Configuring Custom Notifications Channel“- Öffne deine Kontoeinstellungen und gehe zum Tab Benachrichtigungen.
- Klicke auf Benutzerdefinierten Benachrichtigungskanal einrichten.
- In the appeared dialog, paste the Google Chat webhook URL in the URL field.
- Select application/json for the Content type.
- Paste the following payload in the Payload field:
{"text": "{{notification-message}}"}
- Klicke auf Benachrichtigung testen, um eine Testnachricht von Crowdin an deinen Google-Chat-Kanal zu erhalten.
- Once finished with the configuration, click Save.
Um benutzerdefinierte Benachrichtigungen von Crowdin in Microsoft Teams einzurichten, gehe wie folgt vor.
If you don’t have a Microsoft Teams account already, you will need to create one.
Download and install the Microsoft Teams desktop app. Alternatively, you may use the Microsoft Teams web interface for further configurations.
To receive notifications in Microsoft Teams, you need to create a webhook. Once finished, copy the webhook URL. Du benötigst dies für die Konfiguration auf der Crowdin-Seite.
Read more about creating a Microsoft Teams webhook.
Configuring Custom Notifications Channel
Abschnitt betitelt „Configuring Custom Notifications Channel“- Öffne deine Kontoeinstellungen und gehe zum Tab Benachrichtigungen.
- Klicke auf Benutzerdefinierten Benachrichtigungskanal einrichten.
- In the appeared dialog, paste the Microsoft Teams webhook URL in the URL field.
- Select application/json for the Content type.
- Paste the following payload in the Payload field:
{"text": "{{notification-message}}"}
- Klicke auf Benachrichtigung testen, um eine Testnachricht von Crowdin an deinen Microsoft-Teams-Kanal zu erhalten.
- Once finished with the configuration, click Save.
Per-project notifications with the Microsoft Teams App
Abschnitt betitelt „Per-project notifications with the Microsoft Teams App“Benutzerdefinierte Benachrichtigungen ermöglichen es dir, deine kontospezifischen Benachrichtigungen von Crowdin zu erhalten. Wenn du Benachrichtigungen zu einem bestimmten Projekt erhalten möchtest, das du in Crowdin verwaltest, kannst du unsere Microsoft-Teams-App verwenden.
Um benutzerdefinierte Benachrichtigungen von Crowdin in Telegram einzurichten, gehe wie folgt vor.
If you don’t have a Telegram account already, you will need to connect with a phone. Telegram uses your phone number as a primary credential which you’ll use to log into your account.
So firstly, download and install the Telegram app using Android or iOS. Once signed up, you may use the Telegram web interface with a PC or Mac to simplify further configurations, but this part is up to you.
To receive notifications in Telegram, you need to create a bot. Once finished, you will be provided with a bot’s API token. Make sure to save it; you’ll need it later.
Read more about creating a Telegram bot.
Der nächste Schritt besteht darin, einen öffentlichen Telegram-Kanal zu erstellen, über den du Benachrichtigungen von Crowdin erhältst. Later you’ll be able to change the channel’s privacy if needed.
To create a Telegram channel, follow these steps:
- Open Telegram on your device.
- Click on the pen icon and select New Channel.
- Name your channel in the Channel name field.
- (Optional) Specify a channel description.
- (Optional) Click on the camera icon to set a display picture for your channel.
- Click Next in the top-right corner.
- Select Public channel type.
- Specify a permanent link for your channel. This link is what people would use to search and join your channel.
- Click Next in the top-right corner.
- (Optional) In this step, Telegram will ask you to add subscribers to your Telegram channel. Select contacts you’d like to add, including your new bot (provide your bot with Admin permissions). You can choose not to add any members for now since you’ll be able to do it later.
- Click Next in the top-right corner to continue and create your channel on Telegram.
Configuring Custom Notifications Channel
Abschnitt betitelt „Configuring Custom Notifications Channel“- Öffne deine Kontoeinstellungen und gehe zum Tab Benachrichtigungen.
- Klicke auf Benutzerdefinierten Benachrichtigungskanal einrichten.
- In the appeared dialog, specify the URL in the following format:
https://api.telegram.org/bot{bot_API_token}/sendMessage. - Select application/json for the Content type.
- Paste the following payload in the Payload field:
where{"chat_id": "{public_chat_id}","text": "{{notification-message}}"}
{public_chat_id}– Your public chat id you specified for your channel link during the Telegram channel configuration. - Klicke auf Benachrichtigung testen, um eine Testnachricht von Crowdin an deinen Telegram-Kanal zu erhalten.
- Once finished with the configuration, click Save.
Wenn du deinen Telegram-Kanal privat machen und weiterhin Benachrichtigungen erhalten möchtest, gehe wie folgt vor:
- First of all you need to acquire your Telegram channel’s original chat id by visiting:
https://api.telegram.org/bot{bot_API_token}/sendMessage?chat_id={public_chat_id}&text=Test - You’ll get a response in a JSON format that will contain your Telegram channel’s original chat id.
- Öffne in Crowdin deine Kontoeinstellungen und gehe zum Tab Benachrichtigungen.
- Klicke auf Benutzerdefinierten Benachrichtigungskanal einrichten.
- In the appeared dialog, modify the URL by replacing the chat id with the one received in the JSON response above.
- Click Save.
- In Telegram, open your channel.
- Click on your channel name and click Edit.
- Click Channel Type.
- Select Private and click Done.